

How To Install Security Onion On Vmware
What is an intrusion detection system?
An intrusion detection system (IDS) is a device or piece of software that sits on your network monitoring for suspicious and downright malicious activity. Without an IDS, at that place is a good run a risk that attacks could be mounted against your network without you even knowing it. Read further to learn how to install an enterprise IDS to your product network.
For this nosotros will use Security Onion and VMWare's ESXI server.
Why use Security Onion?
Not merely is Security Onion a free and open source Linux distribution, it comes with a massive set up of tools to monitor your network. Information technology comes with Logstash, Kibana, Elasticsearch, Zeek, Wazuh, Suricata, Squert, NetworkMiner, and others. Yous tin can accept advantage of the Snort VRT and Emerging Threats IDS rulesets so you can trust you lot have a drove of the virtually recent threat signatures known in the wild. It also comes with an piece of cake wizard that makes setup a breeze.
Setting up the network
We get-go have to setup the network environment in society to monitor all traffic over the network. To practice this, we need to setup a Span port on the switch our ESXI server is continued to. Log into your switch and setup upwardly port mirroring. What this does is make a re-create of all the traffic for each port on your switch and diverts information technology to this port that we will connecting to our Security Onion for monitoring. Keep in mind your server will demand at to the lowest degree two network cards. One for network admission and one for monitoring all traffic on the virtual local area network.

We now desire to configure an additional virtual switch in our ESXI server for Security Onion to have advantage of the Bridge port we just configured on our switch. Log into your server and locate the networking pane from the Navigator. Click on the virtual switches tab and add a standard virtual switch.

Now we need to setup a port group for our new switch. Become back to the networking page and select the port group tab. Select add port group.

Downloading and verifying Security Onion download
At present that everything is setup on the networking side, we need to download a copy of Security Onion. Nosotros can grab the Security Onion ISO file for installation from GitHub. We also need to make sure to verify the ISO image with gpg to confirm our download was not tampered with during transfer.
wget https://raw.githubusercontent.com/Security-Onion-Solutions/security-onion/master/KEYS gpg --import KEYS wget https://github.com/Security-Onion-Solutions/security-onion/raw/master/sigs/securityonion-sixteen.04.vi.6.iso.sig wget https://download.securityonion.cyberspace/file/Security-Onion-16/securityonion-xvi.04.vi.6.iso gpg --verify securityonion-xvi.04.6.6.iso.sig securityonion-16.04.6.6.iso 
Installing Security Onion on ESXI
Now that we have a verified copy of the ISO, we need to transfer it to the ESXI server's datastore. Become to the storage pane from the navigator. Click on the database browser and upload our downloaded ISO.

Now we can create the virtual machine. Click on the virtual machines pane from the navigator. Click on create / register vm. Follow the dialog; name the vm, fix the OS family to "Linux", and ready the invitee OS version to "Other 3.x or afterwards Linux (64-flake). Select your storage, CPU, retentivity, difficult drive, add your boosted span grouping network adapter and select the uploaded ISO y'all merely transferred to the datastore on CD drive i.

Setting upwardly Security Onion
Ability up your new virtual automobile and open console in a new window. Once the virtual machine has booted up to the X-Server, double click on "Install SecurityOnion sixteen.04" to begin the installation procedure.

Tips for the install:
- Don't download updates while installing.
- Don't install third-political party software for graphics, wifi, flash, mp3, or other media.
- Select "Erase deejay and install SecurityOnion" option for all-time operation.
Once the install is done, reboot the system. Eject the ISO from your CD bulldoze 1 of the virtual auto settings.
Afterward restart, click on "Setup" to configure the residue of the settings.
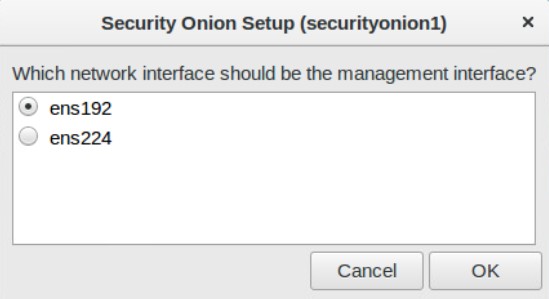
It is a adept idea to fix a static IP and so prepare an unused IP address on your network, its mask, gateway, DNS, and domain proper noun.
Side by side setup your sniffing interface. It should already be selected when you say yes to configuring the interface.
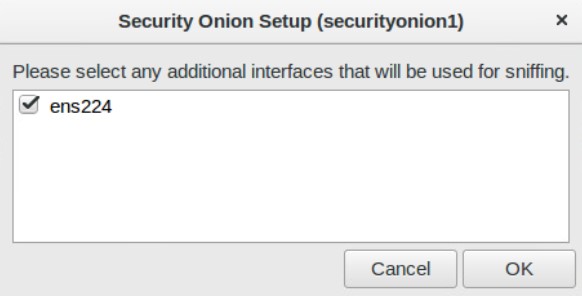
When washed, it should have this dialog. Click "Yes, brand changes".

And then reboot. It's now time for the 2d round of setup. Once rebooted, log in, click "Setup" and skip network configuration this fourth dimension.
- Select product mode
- Follow the first user account setup
- Select "All-time Practices"
- If you lot don't have a subscription to Emerging Threats, or Snort, select Emerging Threats Open
- Depending on your ruleset, select Suricata if you don't have a subscription.
- Enable network sensors services
- When configuring HOME_NET, make sure yous select your private network accost range simply.
One time you lot have configured your settings, allow Security Onion setup one final fourth dimension.
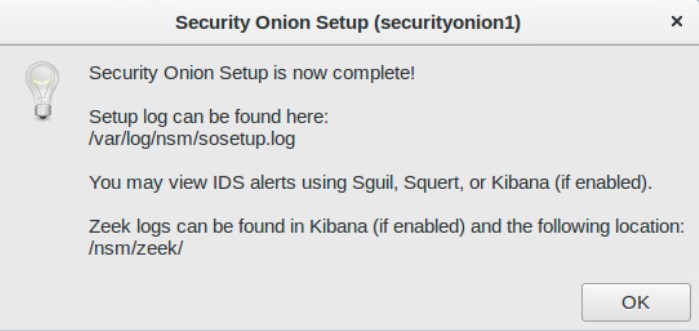
That's information technology. You lot at present have a fully fledged intrusion detection organisation on your network
Ane more than thing is to test and make sure all the services are running correctly on your system. For this we utilise:
sudo so-condition 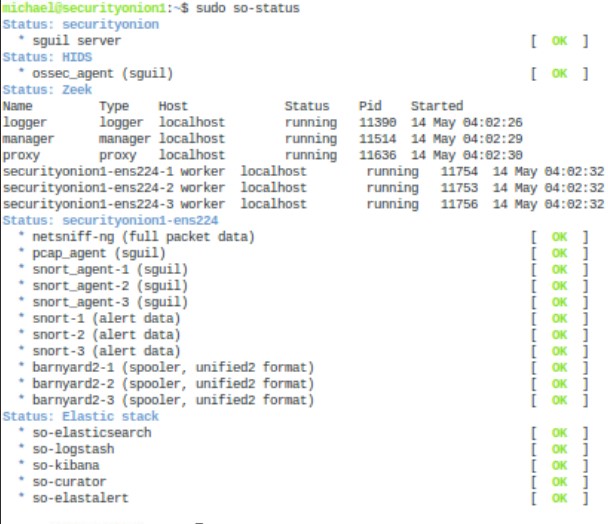
If everything is okay, you should get all green OKs in the terminal. If something isn't working. Use the following command:
sudo so-first Now that you lot accept everything installed, learn to utilize the tools. The following are links to the tools to get you started.
Logstash
Kibana
Elasticsearch
Zeek
Wazuh
Suricata
Squert
NetworkMinor
Snort
Happy hunting for potential threats on your network!
I take been programming for 7 years with over ten years of systems administration. This is my blog to write about technology, current events, lawmaking, spread awareness, rant and rave and write the wrongs of the past. I am into new technology, programming, archery, turntablism, disc golf game and rally racing.

Source: https://www.michaelrinderle.com/2020/05/14/installing-security-onion-to-your-production-esxi-server/
Posted by: mcclintonbeettlefor.blogspot.com
0 Response to "How To Install Security Onion On Vmware"
Post a Comment