

How To Install Ftp On Ubuntu 18.04
Very Secure FTP daemon (VSFTPD) also known as a very secure FTP daemon is a secure way of sending and receiving files from one system to another in UNIX systems. The regular File Transfer Protocol (FTP) is a widely used networking standard protocol. However, FTP is not a secure protocol considering information technology transmits data alongside other of import details without encryption. In this guide, you will learn how to install VSFTPD on Ubuntu 18.04 server.
Prerequisites
Before you become started, ensure that you accept the following in check:
- An instance of Ubuntu eighteen.04 LTS. You can easily deploy a cloud server from Cloudcone starting at but $three.71.
- A regular non-root user with sudo privileges.
- A static IP address (in this case 192.168.0.102) should be available
Step 1: Install VSFTPD
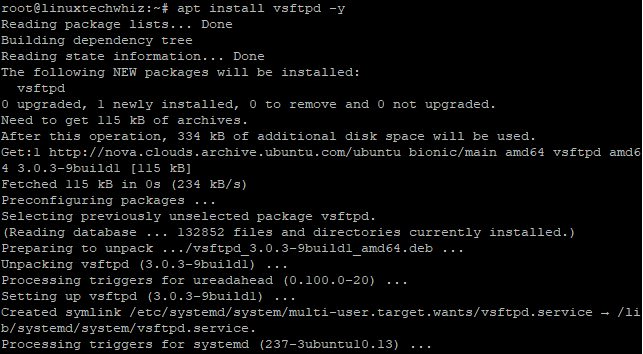
The default repository has the VSFTPD files available making installation a direct frontward. To install vsftpd, execute the control:
# sudo apt-get install vsftpd –y
Sample Output
Afterward the installation outset VSFTPD service by enabling it to start on kick fourth dimension
# sudo systemctl starting time vsftpd # sudo systemctl enable vsftpd
Sample Output

Step ii: Creating the Directory Structure for FTP
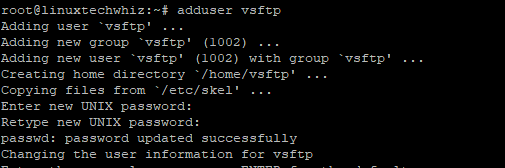
With VSFTPD installed, we are at present going to add a user business relationship. Nosotros will create a new user called 'vsftp' for demonstration purposes. Therefore, the command volition exist:
# sudo adduser vsftp
Sample Output
Adjacent, create an FTP directory and adjust the file buying equally follows
# sudo mkdir /dwelling house/vsftp/ftp # sudo chown nobody:nogroup /home/vsftp/ftp # sudo chmod a-west /home/vsftp/ftp

Create a directory where the files will be uploaded and ownership given to the VSFTPD user
# sudo mkdir /home/vsftp/ftp/test # sudo chown vsftp:vsftp /abode/vsftp/ftp/test
Step three: Configure VSFTPD
With the FTP user and directory in identify, we demand to configure VSFTPD service. before annihilation else, information technology'due south always a adept idea to create a backup of the original config file
# sudo cp /etc/vsftpd.conf /etc/vsftpd.conf.bak
In one case the fill-in is in identify, Open up the vsftpd.conf file
# sudo vim /etc/vsftpd.conf
Add the following lines to the open file
mind=NO listen_ipv6=YES anonymous_enable=NO local_enable=Yes write_enable=Yes local_umask=022 dirmessage_enable=Yeah use_localtime=YES xferlog_enable=Yep connect_from_port_20=YES chroot_local_user=YES secure_chroot_dir=/var/run/vsftpd/empty pam_service_name=vsftpd pasv_enable=Aye pasv_min_port=10000 pasv_max_port=11000 user_sub_token=$USER local_root=/dwelling house/$USER/ftp userlist_enable=Yes userlist_file=/etc/vsftpd.userlist userlist_deny=NO
Save and close the file. Do not forget to edit the higher up file to suit your needs.
Add the vsftpd user to the /etc/vsftpd.userlist file to give FTP access using the command.
# sudo nano /etc/vsftpd.userlist
Adjacent, Add the post-obit line.
vsftp
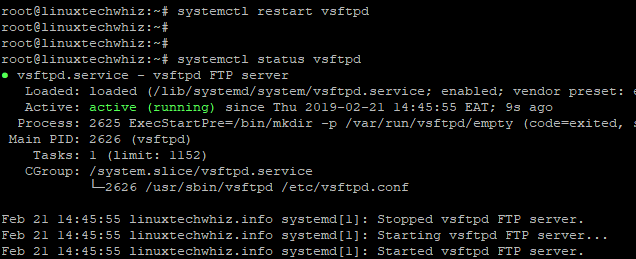
Save and close the file, so restart the VSFTPD services
# sudo systemctl restart vsftpd
Open the web browser and on the URL enter ftp://192.168.0.102 and key in the name and password to access the FTP folio. Enter the vsftpd username and password and then click OK button.
Step iv: Secure VSFTPD using SSL/TLS
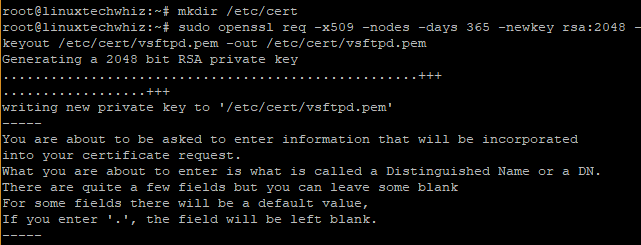
At present we demand to enable SSL/TLS to encrypt all data transferred via FTP. For this to happen, you lot demand to create a certificate using the OpenSSL equally shown
# sudo mkdir /etc/cert # sudo openssl req -x509 -nodes -days 365 -newkey rsa:2048 -keyout /etc/cert/vsftpd.pem -out /etc/cert/vsftpd.pem
Sample Output
Then alter the vsftpd.conf file and brand some changes
# sudo nano /etc/vsftpd.conf
Edit the file by adding the following lines
rsa_cert_file=/etc/cert/vsftpd.pem rsa_private_key_file=/etc/cert/vsftpd.pem ssl_enable=Yeah allow_anon_ssl=NO force_local_data_ssl=YES force_local_logins_ssl=Yeah ssl_tlsv1=Yeah ssl_sslv2=NO ssl_sslv3=NO require_ssl_reuse=NO ssl_ciphers=HIGH
Save the file and restart the vsftpd using the following command
# sudo systemctl restart vsftpd
Step v: Access FTP over SSL / TLS
It is not possible to access FTP server over a browser, so you need an FTP application such as FileZilla to admission the FTP server. Utilise the following command to install
# sudo apt-become install filezilla -y
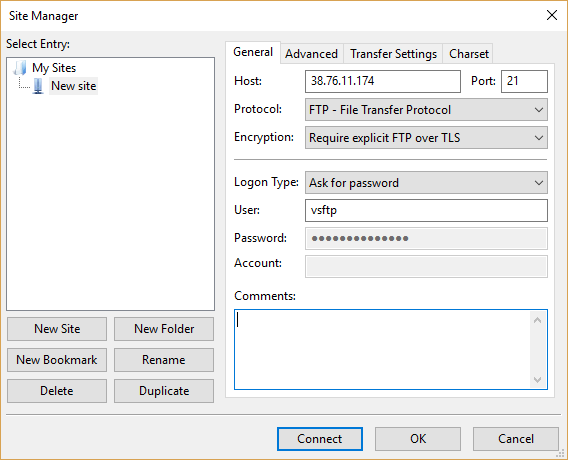
Click on Files > Sites Manager
Add the New site and give it a new host or site name, IP address. Select 'FTP' as the protocol and define Encryption as 'Require explicit FTP over TLS'
Click on the Connect push and a screen with a certificate that needs to be verified for use during the SSL/TLS
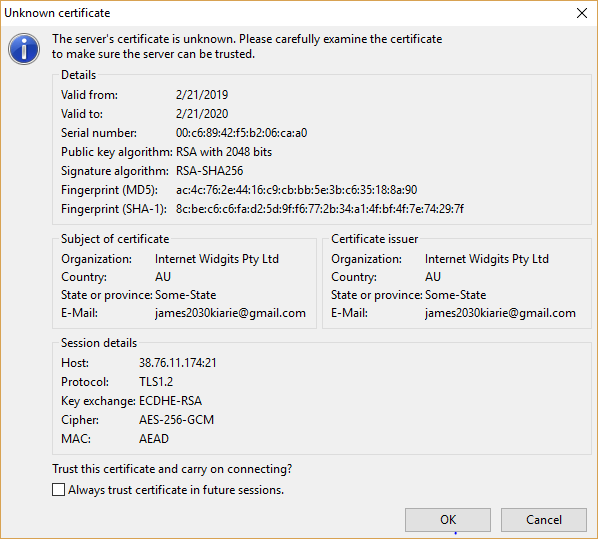
connection. Click OK .
FileZilla will authenticate and lead the contents of the abode directory of the VSTPD user
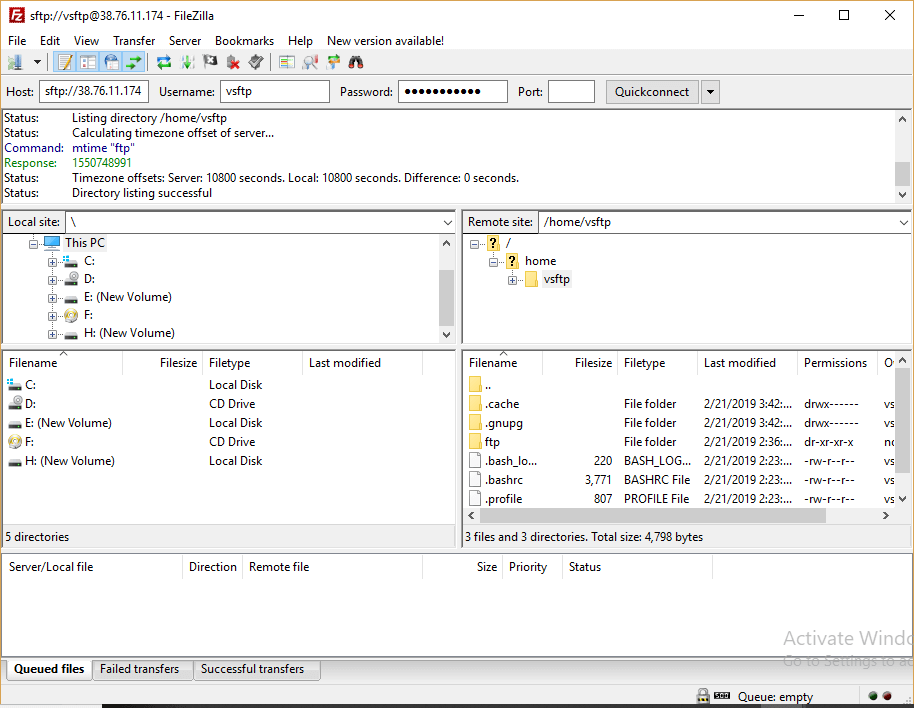
Awesome! We have successfully installed and configured VSFTPD on Ubuntu eighteen.04 server. In this guide, you accept learned how to install VSFTPD on Ubuntu eighteen.04 LTS. Your feedback is much welcome.

Source: https://cloudcone.com/docs/article/how-to-install-vsftpd-on-ubuntu-18-04/
Posted by: mcclintonbeettlefor.blogspot.com
0 Response to "How To Install Ftp On Ubuntu 18.04"
Post a Comment